How to configure Multicharts with Pix Connect ?
Before starting Multicharts Setup, make sure that you have downloaded and installed Pix Connect and TA Extension.
If not then please download and install from the link below.
Step-1- After Downloading and Installing both the applications please give the admin rights.
How to give Admin rights? >> Video Help
Now allow both the applications in windows firewall or antivirus exception list >> Video Help
Step-2:- Open the PixConnect application and enter the CRN number which you have received from the Accelpix Support team.
Step 3- Open the Multicharts Application
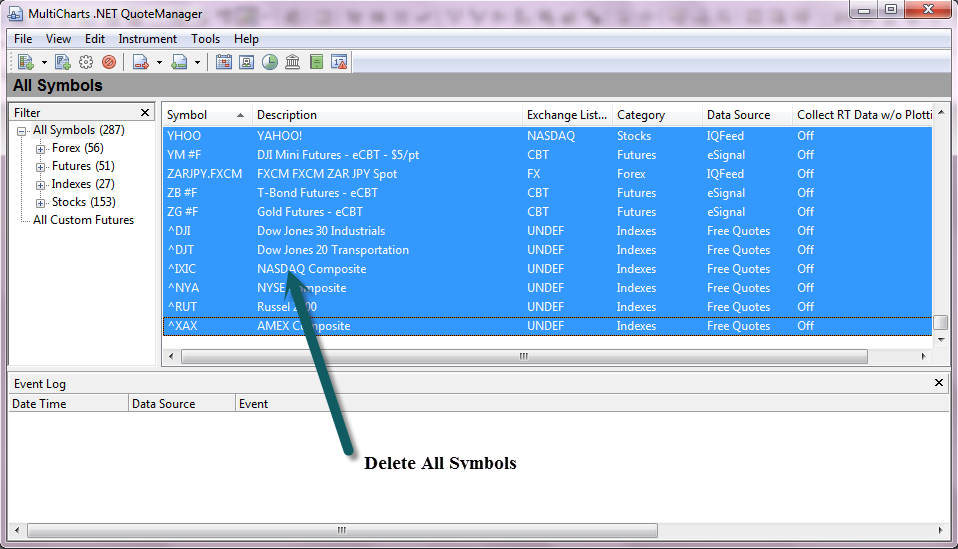
Step 4:- Now go to the New >> QuoteManager Window
Step 5:- Select All and Delete all symbols
Step 6:- Now go to the Tools >> Data Sources
Here just check the eSignal status should be active.
Step 7:- Now go to the Instrument >> Add Symbol >> Manually
Step 8:- Now in Add Symbol windows
Data Source :- eSignal
Symbol Name :- NIFTY_I
Category :- Future
Exchange:- NSE
You would have to repeat the same activity to add the multiple symbols in your Multicharts.
Step 9:- After adding multiple symbols, that list will show you in Quote Manager as below.
Step 10:- Now go to the New >> Chart Window
You can see the symbols which we were added showing here
Let's Select NIFTY_I and Open the same
This is how you can load the charts in Multicharts using Pix Connect.
Wishing you the Happy and Most Profitable Trading!
We would love to help you, so please feel free to contact us for any help or support.
LIVE CHAT Support >> Click Here
E Mail Support >> write an email to support@accelpix.com
Call Support: +91 990 999 3349