How to configure real time data in Amibroker with Pix Connect
Configure PixConnect with Amibroker ?
First of all, you need to download and install the PixConnect Application from Download Library.
After installing the PixConnect Application you would have to follow the steps below.
Step:- 1- Create The New Database
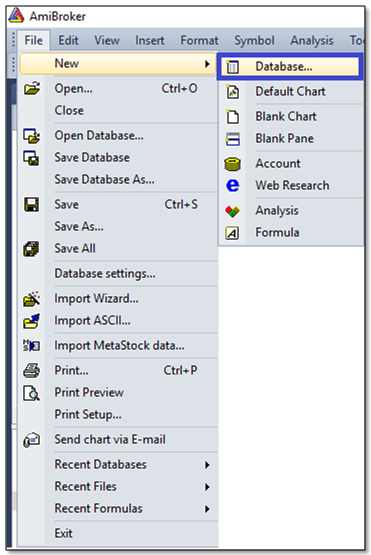
1. Click on File >> New >> click on Database as shown below.
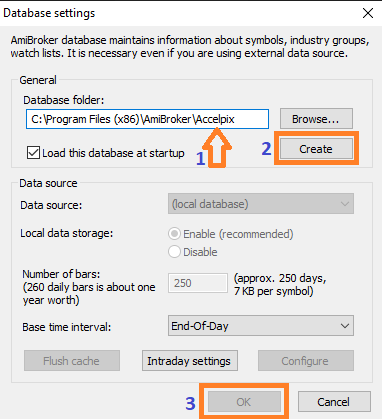
2. Enter
new database name Accelpix and click on ‘Create’ Button.
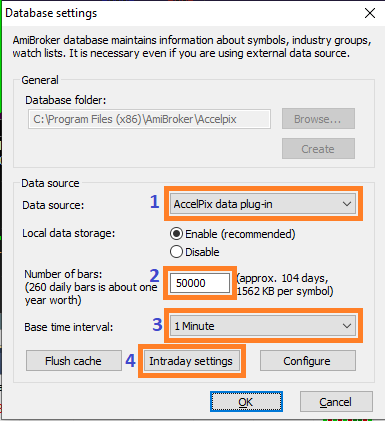
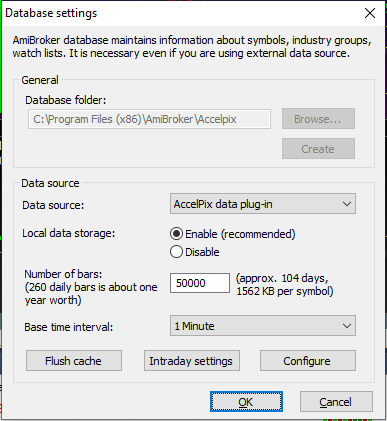
3. In Data Source please select “Accelpix RT data Plug-in”.
Enter 50000 for
‘Number of bars’ and 1 Minute as a Base time Interval.
Choosing ‘Tick’ as Base Time Interval: If you want to see
range bars or smaller than a 1-minute time frame, you have to choose ‘Tick’ as
Base Time Interval.
Selecting ‘1 Minute’ as default.
Notes: -
Irrespective of whether you choose ‘Tick’ or ‘1 Minute’, the data would
be updated and delivered tick by tick (1 second- Realtime) only.
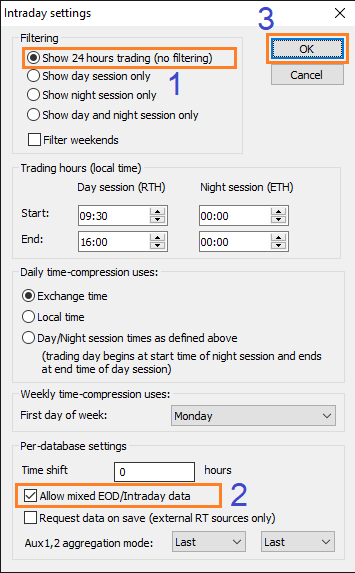
4. Now
in Intraday Settings, Do the same as shown below and click OK
5. Please make sure that the Database Settings as shows as below
screen and click OK.
Now
your database setting is completed.
How To add Symbols?
You
can add symbols/tickers directly in Amibroker or From PixConnect Application
Step
1: - Add symbol in Amibroker
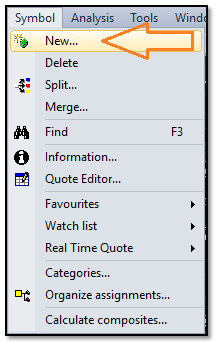
Go to Symbol >>
Click on New
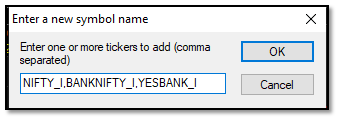
Enter Symbols' name as per your
choice. For Example - NIFTY_I, BANKNIFTY_I, YESBANK_I (comma separated) and
click OK.
As per the below screenshot.
Step: - 2 From
PixConnect Application.
Open Pix
Connect App.
Now Go to the Symbols Search
Options
Select the symbol as per your
need or select all.
Filter Futures, Options, Equity or Indices.
You need to select the expiry date
(Weekly or Monthly as per your need)
Please note the weekly options
available with NIFTY and BANKNIFTY only. There are NO Weekly options for other
stocks.
Now Click on Search
You will get the search result at
the bottom.
Now select few or all symbols
After selecting all symbols in Pix
Connect please go to the Amibroker Database Settings once again.
In Amibroker go to the >> File >> Database Settings
>> click on configure to add all symbols in Amibroker from PixConnect
application.
Now you can see the selected symbols
in the PixConnect app would come into the Amibroker symbols list.
Step 3:-
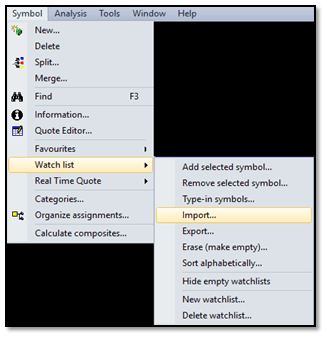
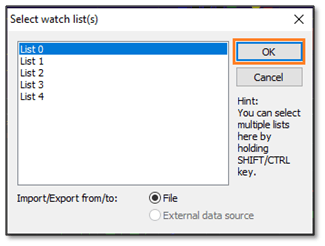
You can also add symbols directly using Amibroker Import Options.
Just go to the Symbol >> Watch List >> Import
Now you would have to select the
watch list and add symbols list and click on OK.
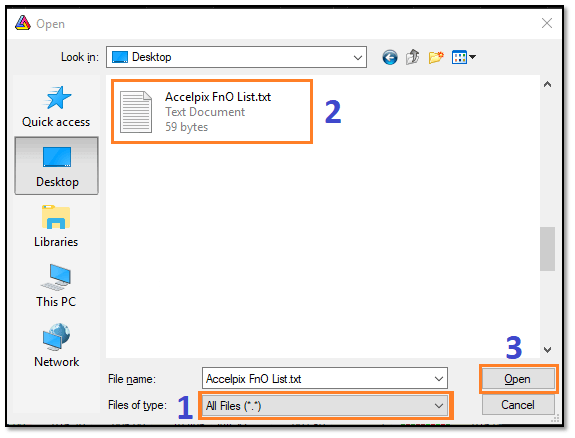
Browse your file location and
click Select the file.
( Notes:- The File which you are adding must
be in TXT or CSV format.)
If you don't have the symbols list, please go to the download page on our website and get all the symbols.